Friday, 25 October 2013

What is so mean about Greenwich Mean Time?

What is so mean about Greenwich Mean Time?


Winter GMT photo fc58ad77-f3da-4645-8a14-29331b02869a.jpg


For many years in the UK we have been obliged by law to put our clocks forward one hour to British Summer Time (BST) in Spring, and to put them back an hour to Greenwich Mean Time (GMT) in Autumn. This makes me very grumpy in October. In fact, Greenwich is a very mean time for the majority of people in the UK because it means that it suddenly gets dark in the afternoon, just when we are out enjoying the Autumn sun.

It gets even meaner as we approach December when it becomes dark at 15.30 in the afternoon. This means the winter is very dreary and depressing due to lack of light. Not to mention the increased use of electric lighting - which worsens the climate change and emissions problem, and the size of our energy bills!

Perhaps the meanest thing about GMT is that the early dark causes hundreds of deaths and serious injuries on our roads that could be avoided if the UK stopped putting the clocks back. Many of these casualties are children who would get home safely if it were still daylight when they left school.

So why do we do it? We are told it is because some farmers in the far north of Scotland complain that it does not get light there until 10.00 am. But does that justify the whole of the UK changing to GMT and sacrificing precious children and daylight for a tiny minority in the North? I think not. What is there to prevent Scotland from setting it's own time zones? Nothing at all. Then we would all be happy. There is no reason either to have to fit in with other European Summer Time zones.

So I support the campaign to stop putting the clock backwards and forwards every six months, and to remain on BST. My manual clocks and watches will remain on BST, except my computers, phone and video player, which are happy little robots that do what the government says without complaint.

© Martha Magenta

http://www.bristolpost.co.uk/Hands-Stop-clocks-going-say-motorists/story-19979621-detail/story.html

http://www.lighterlater.org/

https://www.facebook.com/lighterlater

http://www.rospa.com/about/currentcampaigns/lighter-evenings/

Animal Rights Links


Vegan Recipe & Cooking Links


Herbal & Garden Links


Martha Magenta's Poetry Links


General Topic Links


Saturday, 19 October 2013

Ghoulish Halloween Party Recipes

Ghoulish Halloween Party Recipes


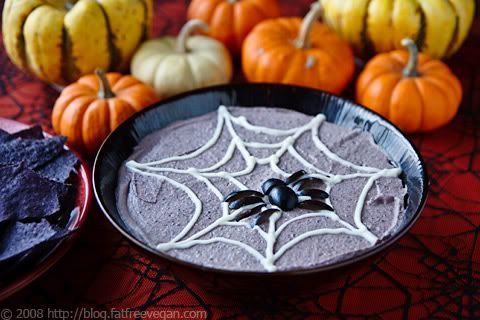
Spooky Black Bean Hummus


Black bean hummus photo black-bean-hummus.jpg


Ingredients
2 cloves garlic
2 15-ounce cans black beans, drained and rinsed
2 tablespoons tahini
3 to 4 tablespoons lime (or lemon) juice
1 teaspoon cumin
1/8 to 1/4 teaspoon chipotle pepper -- to taste
3 tablespoons soy yogurt (optional)
1/2 teaspoon salt (or to taste)
For Design: additional soy yogurt or tahini

Instructions
With food processor running, drop in the garlic cloves and process until finely chopped. Add the black beans, and process until pureed. Add the remaining ingredients (use the lesser amounts) and process until smooth. Taste and correct seasonings, adding more as needed.

Spoon the hummus into a serving dish, smoothing the top. Using a pastry bag and either soy yogurt or thinned tahini, pipe on the design. Place a plastic spider into the web, or make one yourself from black olives. Refrigerate until ready to serve.


Bat Chips


batchips photo batchips.jpg


Ingredients
1 large flour tortilla per person
1/4 cup olive oil
Salt

Directions
Preheat your broiler. Using Halloween cookie cutters, cut each tortilla into bat and ghost shapes. Lightly brush both sides of each creature with oil. Arrange on a cookie sheet or jelly roll pan. Broil, flipping once when they begin to brown. When brown on both sides, lightly sprinkle with salt.

Enjoy!


Spicy Sandwich Halloween Cookies

By 265 Halloween


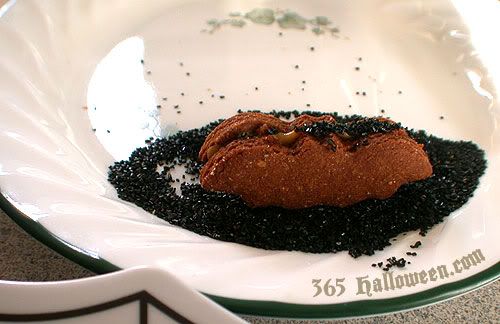
Sandwich cookie photo sandwich-cookie.jpg


Like Leap Years, really delicious Halloween cookie recipes don’t materialize very often. As fans of the unusual, we decided to pair these 2 phenomenons together. Thus, we present to you the recipe for the crowd favorite dessert from last year’s Halloween party: Ginger Cookies with Spicy Pumpkin Cream Filling. They were a huge hit and were quickly devoured by guests. There are 2 options for preparing these Halloween cookies, based on how quick/easy you want them to be or how much sugar you want in them. The cookies are low sugar and can be eaten alone (as a drop or cut out cookie), but the addition of a spicy cream filling and black sugar topping can transform them into super sweet confections. We love them both ways, and you probably will, too.

Molasses Sweetened Ginger Cookies Recipe

Ingredients
* 3 c. unbleached flour (I like 1/2 spelt, 1/2 whole wheat)
* 2 tsp. baking powder (non-aluminum)
* 1 tsp. cinnamon
* 1 tsp. ginger
* 1/2 tsp. cloves
* 1/2 c. margarine (Earth Balance brand is great)
* 1 cup unsulfered molasses (use corn for lighter taste or blackstrap for a full-bodied taste)
* 2 Tbsp. maple syrup or unbleached sugar (optional, or try a sprinkle of stevia powder)

Instructions
Mix dry and wet ingredients separately then add together to form a thick, soft dough. Refrigerate for 20 minutes. Lightly grease cookie sheet with margarine. For cut out cookies, shape dough into 2 large balls and roll out on floured surface for cutting out. For drop cookies, roll into small balls and flatten with the bottom of a greased glass. 1/4″ thickness will produce crispy texture, and thicker cookies will be softer. If desired, sprinkle lightly with sugar before baking. Bake at 350F for 10 minutes.

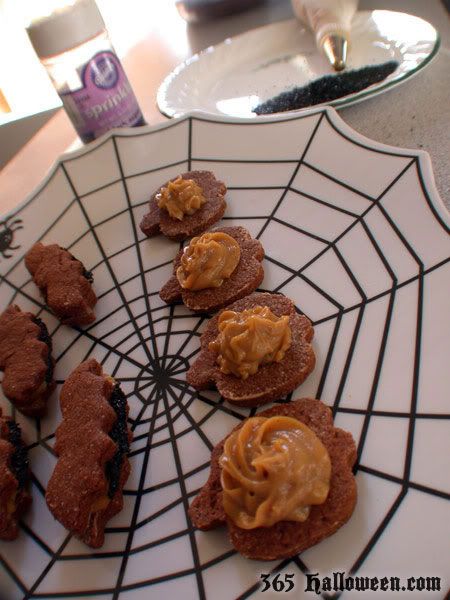
While these are baking, you can make your spicy cream filling. Either use a pastry bag or drop spoonfuls of filling in-between the cookies. Optionally, you can dip the finished sandwich cookies in black sugar (which is plentiful around October) for an extra Halloween-y look. The “cream” thickens as it cools, so if you must refrigerate before piping it onto your cookies, let it warm up first or give it another whirl in your food processor.

Spicy Pumpkin Cream Filling (Optional)
(Originally posted at the PPK)

Ingredients
* 12 oz. firm silken tofu, thoroughly drained
* 1 c. pumpkin puree
* 1/4 c. cashew butter or cashews
* 1/2 tsp. salt
* 1/2 tsp. lemon juice
* 1 tsp. vanilla
* 1 c. sugar (or 2/3 c. fructose)
* 1 tsp. molasses
* 1 tsp. cinnamon
* 1/4 tsp. ginger
* 1/4 tsp. nutmeg
* 1/2 tsp. nutritional yeast (sounds weird, but makes a yummy difference)
* 2 Tbsp. cornstarch + 2 Tbsp. water

Instructions
Rinse and wrap tofu in cheesecloth or lint-free kitchen towel and drain it for a few hours. You can cut this time down to about 5 minutes by wrapping, then just squeezing the tofu. You want to reduce it down to 1 cup. This step is important to encourage a thick texture and reduce the soy taste.

In food processor or blender, whiz up the tofu until it is velvety smooth. If you are using cashews (instead of cashew butter) add those now and whiz again until smooth. Add the rest of the ingredients except the cornstarch/water mixture, and mix it again until smooth.


Sandwich cookie2 photo sandwich-cookie2.jpg


Mix up the cornstarch and water and set aside. Transfer the pumpkin cream to a saucepan and heat on low just until it’s warm. Stir in the cornstarch/water mix and stir constantly until the mixture starts to get thick, about 5 minutes.

Even if you mixed really well during this last phase, you will probably have a few tiny chunks. You have 2 options. Ignore them and your recipe is done! Or, if you are going to use a pastry bag to pipe this out then you should put it all back into the blender or food processor and whiz it up smooth again. Even itty bitty chunks can clog a small pastry tip. Then again, you could use a large pastry tip.

Let cool completely and watch it turn all custard-y.


 photo a8ee4db2-e981-4c86-bd41-517c01f8152a.jpg


Here’s a little proof from the party: about half way through the night there were only 9 cookies left from the 2 gigantic trays that we bought. Chow down!


Mummy Dogs with Green Goo

By 365 Halloween


Mummy dogs photo mummy-dogs.jpg


A little bit of presentation turns "pigs in a blanket" into oozy mummy dogs! This is super simple and even healthy if you follow these suggestions. Normally this meal is plenty creepy on its own since hot dogs are made from scrap pieces of various species of dead animals. Eeeew. Just grab yourself a pack of veggie dogs (I prefer Mummy Dogs with Tofu Pups and Smart Dogs, some biscuit dough, and a batch of Green Goo and you’ve got yourself some yummy mummies.


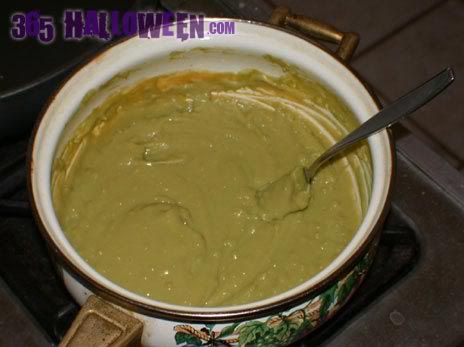
green goo photo green-goo.jpg


Step 1: Make the Green Goo sauce. Make a vegan "cheese" sauce and add a natural green food coloring - puréed spinach works a treat and you won't notice the taste!

Step 2: Make your biscuit mummy wrapping. Either pop open a pre-made can (but really, check out those ingredients. Scary!) or make your own from scratch, using this recipe for Vegan Bisquits.


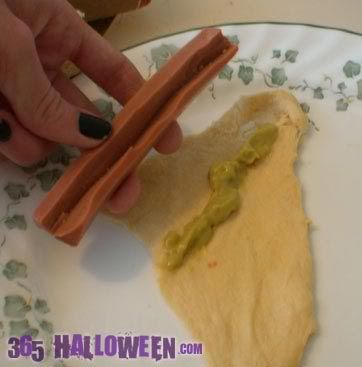
Mummy dogs2 photo mummy-dogs2.jpg


Step 3: Put it all together! I tried making slices in some of my veggie dogs to give the cheese plenty of room to goo around (see picture), but it didn’t seem to make any difference compared to the veggie dogs that didn’t have slices in them. So lay out your biscuit dough (a little bit goes a long way), lay down the dog, put a glob of Green Goo along the length of the dog, and wrap the whole thing up. Although it’s easier to just roll them up triangle style, it looked infinitely better when I meticulously wrapped the dough around several times to look like real mummy wrappings. Pull the dough until it’s thin and wrap, wrap, wrap. Make sure to leave room for the “face” to show so you can do a little decorating. I made slits for mouths and tiny holes for eyes filled with yellow mustard seeds. Pimento pieces for super creepy red eyes, or black mustard seeds would probably make excellent substitutes.

Step 4: Well, just bake them up! The cooking time for the biscuits should be sufficient, but recipes and hot dogs vary, so just keep an eye on them. Proceed to chomp down. Notice the creepy, yet delicious Green Goo that oozes from your mummy and be glad that such a holiday as Halloween exists : )

Enjoy!


Gingerbread Zombies

365 Halloween.com

 photo 222faec2-03d0-46a7-b8cd-2177abb785d4.jpg


Flesh chomping, brain biting, limb severing: why do zombies have all the fun? Now you can make your own edible little people and get some zombie revenge at the same time. With a little slicing and icing, simple gingerbread cookies morph into creepy yet delicious corpses for you to feast upon. And you don’t even have to resort to cannibalism!

Ingredients
1/2 cup sugar (or 1/3 c fructose; no other subs needed)
1 teaspoon powdered ginger
1 teaspoon cinnamon
1 1/2 teaspoons baking soda
1/4 teaspoon salt
1/3 cup molasses
1/3 cup soymilk (or other non-dairy milk)
2 1/4 cups whole wheat pastry flour

Instructions
Preheat oven to 275°F. Lightly oil two or three baking sheets with vegetable oil, then dust with flour.

Mix the sugar (or fructose), ginger, cinnamon, baking soda, and salt in a large bowl. Add the molasses and soymilk and mix well. Add 1 cup of flour and mix well. Mix in enough of the remaining flour to make a very stiff dough.

On a floured surface, roll a portion of the dough with a flour-dusted rolling pin to 1/8 inch thick (or even thinner if you like them crispy). Cut the dough into human shapes with a flour-dusted “gingerbread man” type cookie cutter. Using a knife, cut off legs, arms, chunks out of the head, etc. Use your fingers to further distort them, bending their necks and limbs at grotesque angles, making some limbs longer than others. Just try to keep a uniform thickness (about 1/8″) so they will bake evenly.

Using a spatula, carefully transfer the cookies to the baking sheets. Bake until the edges are dry and the centers give just slightly when pressed, about 20 minutes. Cool on a baking sheet for 5 minutes, then transfer with a spatula to a wire rack to cool. Once fully cooled, store in an airtight container. Makes about 48 cookies.

Use a standard “gingerbread man” type cookie cutter or anything that resembles a human. There are some “running man” shapes available that would probably be perfect. Then take a sharp knife and cut off legs, arms, chunks out of the head, etc.
Perpetual Kid now offers “ABC Gingerbread” cookie cutters that would work perfectly.

After you have transfered them to a cookie sheet, use your fingers to further distort them, bending their necks and limbs at grotesque angles, making some limbs longer than others. Just try to keep a uniform thickness so they will bake evenly.


 photo c2713e5c-3a49-46ef-aff5-6d0888631dac.jpg


After baking the bodies and letting them thoroughly cool, it’s time to add the details. Using a thick decorator’s frosting (loads of powdered sugar with a dash of liquid) in an icing bag and a small tip, pipe on some features and gore. With plain white frosting I added zombie features like exposed ribs, torn clothing, uneven or X-shaped eyes, and gaping mouths. A line of frosting around the edge gives it a more complete look. Then add reddish food coloring to the remainder of the white frosting and pipe on the gore (natural food dye in red/blue worked great; it gave an almost mauve color that looked more creepy than the standard Romero-red). Place “blood” on the edges of torn limbs or anywhere that you’ve inflicted damage upon your appetizing army of the undead. Exposed walnut brains are a delicious crowd pleaser; immediately place a walnut piece after adding a small pile of “bloody” frosting on the head wound.


 photo df512f89-ce08-441b-96d8-4690991c66b1.jpg


Final step: remorselessly devour these gingerbread ghouls.


Photobucket


Halloween Pumpkin Cake


Skellington cake1 photo skellington-cake1.jpg


This one is *slightly* low-sugar, and truly low-sugar if you go frosting-free. Because we’re all busy shoveling candy into our mouths around this time of year, low-sugar recipes should be a staple in everyone’s kitchens. But don’t worry, it doesn’t taste low-sugar unless you eat it without frosting and even then it’s just not cavity-aching sweet.

Super Yummy Vegan Pumpkin Spice Cake (Vaguely Low-Sugar)

Ingredients
* 1/2 C soy margarine, room temperature (Earth Balance brand is the best!)
* 1 C brown sugar
* 2 egg replacers (I use Ener-G Egg Replacer or 1/2 c. applesauce, but other options abound!)
* 1 C fresh or canned pure pumpkin
* 1 tsp pure vanilla extract
* 2 C unbleached flour (I like spelt or whole wheat)
* 2 tsp baking powder (reduce to 1 tsp if using Ener-G)
* 1 tsp baking soda
* 1/2 teaspoon salt
* 1 tsp ground cinnamon
* 1 tsp ground ginger
* 1/2 tsp ground nutmeg
* 1/4 tsp ground cloves
* Plus any other spices that you like
* 1/2 C soy buttermilk (add 2 tsp vinegar to 1/2 C soy milk and let curdle)

Preheat the oven to 350F. Grease and flour two 8 inch cake pans.

In large bowl cream the soy margarine and sugar until light and fluffy (about 2-3 minutes). Add the egg replacer and mix well. Add the pumpkin puree and vanilla and beat until incorporated.

In a separate bowl, whisk together the flour, baking soda, baking powder, salt and spices. Add the flour mixture and soy buttermilk alternately to the pumpkin batter, in three additions, beginning and ending with the flour mixture. Pour the batter into the prepared pans and bake for approximately 30 minutes, or until a toothpick inserted in the middle comes out clean. Cool for 10 minutes and then invert and remove the cakes from their pans. Cool completely before frosting.


Skellington cake2 photo skellington-cake2.jpg


Frosting
I’m really not in love with any particular frosting, but I have some suggestions. To make this a full fledged low-sugar desert, you can use this refined-sugar-free (yet astoundingly delicious) recipe called Date Butter Frosting. I added coconut flakes instead of extract (since that’s what I had in my kitchen) and it was REALLY good. Another healthy yet decadant alternative is made with about 1 C raw nuts (cashew or whatever), 2 handfuls dates, carob or cocoa to taste, and a little fresh lemon juice and water. Oh WOW is that stuff good, and carob/cocoa goes so well with pumpkin. (You could then make the Pumpkin King design with powdered sugar.) If your idea of frosting is that “pourable” bizness, you might not appreciate these recipes. Everyone else, rejoice in the natural sweetness of dates! For the sweet teeth in the audience, and I must confess that I often fall into this category, you will want a cream cheese flavored frosting. Here’s one called Tofu Cream Cheese Frosting and another that is just called Dairy Free Cream Cheese Frosting. (Any kind of non-dairy cream cheese will do in that second recipe.) If you’re new to the whole “baking without animal-based secretions” thing, don’t be frightened! These recipes are all really good and taste marginally or no different than their non-vegan counterparts. You can even make your own dairy-free cream cheese, and concoct your own recipe from there. Get creative!

To create the Pumpkin King design
Transport the cake using toothpicks and foil. First frost your cake and let it sit for a little while so that the frosting forms a little skin. If it’s very wet the stencil will stick to it and try to ruin your design. You’ll then need the "Pumpkin King" stencil from Zombie Pumpkins. Trace that design onto some wax paper (or "freezer paper") and cut out the black pieces. Take your new stencil and lay it, shiniest side down, onto the top of the cake. Push lightly around the edges to get it to lightly adhere. Shake some colored sugar sprinkles (or something else if you’re feeling creative) onto the cake until there is a layer of sugar on every frosted surface. Carefully peel off the stencil, taking your time with the severe angles of the mouth.

To transport the cake (because this knocks the socks off co-workers, family, kids, and party-goers alike) place some short toothpicks or thin skewers into the cake at 3-5 spaced out intervals, and then delicately mold the aluminum foil around the cake and plate.


Spookypan1 photo spookypan1.jpg Spookypan2 photo spookypan2.jpg


The only way a Halloween cake could look any better would be if it were in a spooky shaped pan.

Enjoy!


Animal Rights Links


Vegan Recipe & Cooking Links


Herbal & Garden Links


Martha Magenta's Poetry Links


General Topic Links


Wednesday, 16 October 2013

Graveyard Ghoulash & Hot Mulled Green Blood

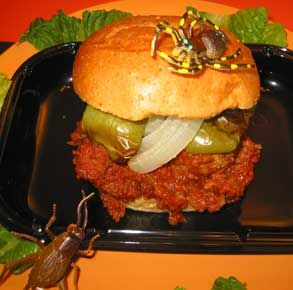
Graveyard Ghoulash

(Italian Meatball Sandwiches)

Yield: about 10 servings
By Vegetarian in Paradise


Graveyard Ghoulash photo graveghoulash.jpg

Meatballs

9 slices whole wheat bread
3/4 cup (180 ml) unsweetened soymilk

3 pounds (1.5 kilos) Lightlife Gimme Lean Sausage flavor
1 medium onion, diced
5 cloves garlic, minced
1 1/4 teaspoons salt
1 teaspoon dried oregano
1 teaspoon dried basil leaves
1 teaspoon fennel seeds, crushed in a mortar and pestle or mini-chopper-grinder
1/2 teaspoon ground black pepper
Olive or other vegetable oil

Tomato Sauce

2 pounds (1 kilo) Roma tomatoes, finely chopped in food processor
2 medium onions, finely chopped in food processor
1 28-ounce (.8 kilos) can diced tomatoes
2 6-ounce (170g) cans tomato paste
2 cups (480 ml) water
4 cloves garlic, crushed
1 teaspoon dried crushed oregano
1 teaspoon dried basil leaves
1 teaspoon salt
1/4 teaspoon ground black pepper

Add-ins

10 green bell peppers, quartered
5 medium sweet onions, thinly sliced
Olive or vegetable oil
10 well-toasted whole-wheat hamburger or hot dog buns

Instructions: Meatballs

1. Toast the whole-wheat bread, break into small pieces into a bowl, and moisten with the soymilk. Set aside to soften.

2. Combine the Gimme Lean sausage, onions, garlic, salt, oregano, basil, fennel, and pepper in a large bowl, and mix well with the hands. Add the soaked whole wheat bread pieces and continue mixing with the hands until all the ingredients are well incorporated.

3. Place 2 large skillets on the stovetop and pour 2 tablespoons of oil into each. In several batches, form meatballs about 1 1/2-inches (3.5 cm) in diameter and brown them over medium-high heat until golden on all sides. Drain on paper towels, transfer the finished meatballs to a clean bowl, and set aside. Makes about 50 to 60 meatballs.

Tomato Sauce

1. Combine all the sauce ingredients in a 12-quart (12 liter) stockpot and bring to a boil over high heat. Reduce the heat to medium and simmer gently, stirring frequently, until thickened, about 2 hours. Makes about 4 to 5 quarts of sauce.

2. Add the browned meatballs to the sauce and cook about 10 minutes to warm through.

Add-ins

1. While the sauce is simmering, preheat the oven to 375 degrees (Gas Mark 5) Put the green bell peppers into a large bowl and toss with 1 tablespoon of canola oil. Mound the peppers onto one large baking sheet. Toss the onions with 1 tablespoon of oil and mound the onions onto the other baking sheet. Roast them for 30 minutes. Carefully turn the onions and peppers with a spatula, and roast 10 to 15 minutes longer until softened and lightly browned.

2. Toast the buns until they are quite firm so they will be able to support the saucy meatballs without falling apart.

To Serve Informally:

Arrange the onions and peppers on a large platter and put them near the sauced meatballs on the stove top. Place the buns on a platter near the stovetop, and invite guests to build their own sandwiches.


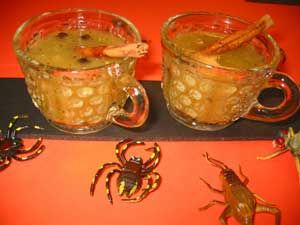
Hot Mulled Green Blood

(Mulled Spiced Kiwi Punch)


Mulled Green Blood photo greenblood.jpg

Yield: about 4 servings

3 cups (720 ml) white grape juice, apple juice, or apple cider, divided
2 fresh kiwis, peeled
2 teaspoons chopped, peeled fresh ginger

3 tablespoons plus 1 teaspoon organic sugar or to taste
2 tablespoons lemon juice or to taste
6 allspice berries
1 cinnamon stick

Instructions

1. Combine 1 cup (240 ml) of the grape juice, kiwis, and ginger in the blender and blend until the kiwis and ginger are completely puréed, about 1 full minute. Add the remaining white grape juice and blend briefly. Then transfer the green liquid to a 3-quart (3 liter) saucepan.

2. Add the remaining ingredients and bring the mixture to a boil over high heat. Reduce the heat to medium and simmer gently about 3 or 4 minutes.

3. Strain the beverage, pressing on the pulp to extract all the juice. Serve in 4-ounce (120 ml) punch cups.

Proportions for 20 servings:

4 1/2 quarts (4.5 liters) white grape juice, apple juice, or apple cider
10 fresh kiwis, peeled
2 tablespoons chopped, peeled fresh ginger

1 cup (240 ml) organic sugar or to taste
1/2 cup (120 ml) plus 2 tablespoons lemon juice or to taste
10 allspice berries
2 to 3 sticks cinnamon

Follow the same procedure as above, then mull in a 10 to 12-quart stockpot. For serving a crowd, strain the beverage into a punch bowl, pressing on the pulp to extract all the juice. Serve in 4-ounce (120 ml) punch cups.

Tuesday, 15 October 2013

How To Make Shrunken Apple Heads


applehead1 photo applehead1.jpg


Shrunken Apple Heads


Shrunken apple heads are great fun to make with the kids for a halloween party.


Applehead2 360 photo 36378f9e-be09-420e-a123-2f007ef5dfda-1.jpg


These shrunken heads are made from peeled, carved, and dried apples. They are as spooky as the scariest Halloween masks, and just as much fun to create. You can transform a Granny Smith apple into a truly frightening fruit. Although any variety of apple will work, Granny Smiths are ideal because of their round shape and texture.


Tools and Materials

Firm, unbruised apples, preferably Granny Smiths
Knife
Marker or pencil
1 cup lemon juice
1 tablespoon salt
Stick or branch


Shrunken Apple Head How-To

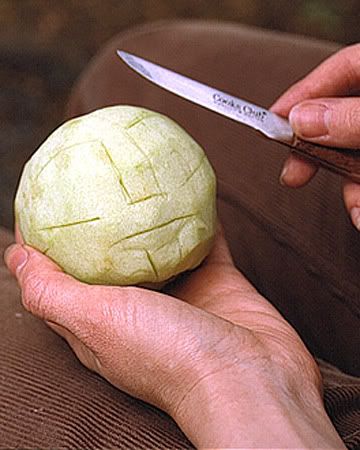
1. Peel and core the apple.

2. Using a pencil or marker, draw facial features, including eyes, a nose, and a mouth, on the apple; be sure to draw the features large enough so they won't vanish when the apple shrinks.

3. Using the outlines as your guide, carve the apple to resemble a skull.

4. Combine lemon juice and salt in bowl. Soak the apple for 30 seconds. Pat dry.

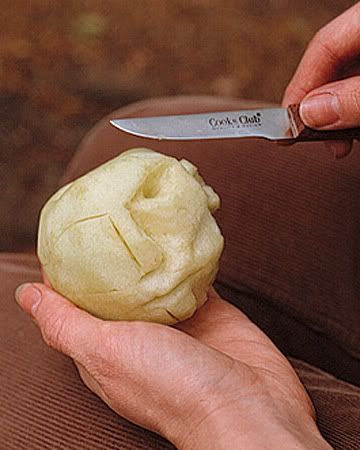
5. Set the apple in a warm, dry spot; after several days, the apple will shrink, and the features will distort.

6. Insert a stick or branch into the bottom of the head and place it in a vase.

Step 1. Peel and core a firm, unbruised apple. Cut guidelines for face.


applehead3 photo applehead3.jpg


Step 2. Carve large features (small ones vanish when shrunken). Soak head for 30 seconds in 1 cup lemon juice and 1 tablespoon salt, to prevent browning; set aside. Repeat for as many heads as you'd like.


applehead4 photo applehead4.jpg


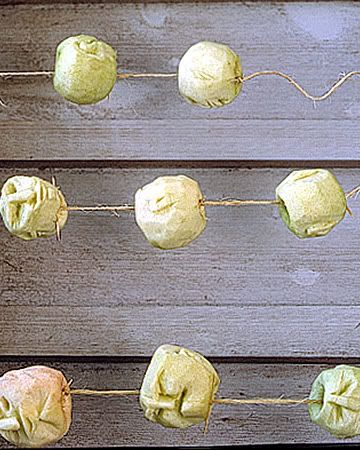
Step 3. String heads on a knotted cord: Insert toothpicks in knots; rest heads on them. In a few days, the apples will shrivel up, and even the most serene faces will turn downright crabby.


applehead5 photo applehead5.jpg


applehead6 photo applehead6.jpg


applehead7 360 photo 551c1dc3-6d8c-4ae1-8214-46e7607b0959-1.jpg


applehead8 photo applehead8.jpg


applehead9 photo applehead9.jpg


applehead10 360 photo 6c018522-9898-41bf-9cf4-f938fe5fa790.jpg


applehead11 photo applehead11.jpg


applehead12 360 photo 360ec0b2-fc77-46f8-a553-ad5b03636522.jpg


 photo e8fa27ab-63c1-4b51-8527-885d24835a6b.jpg


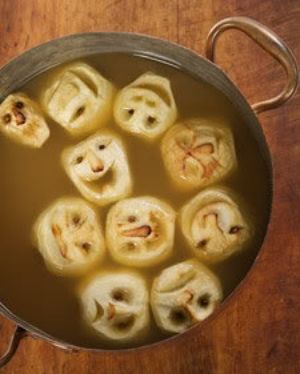
Shrunken Heads in Cider


Shrunken Heads in Cider 300 photo 9ecdd641-38c2-4c31-b3d9-5778a0019fe6.jpg


Ingredients

Serves about 30

* 2 cups lemon juice

* 2 tablespoons coarse salt

* 8 large Granny Smith apples

* 32 whole cloves

* 2 gallons apple cider

*2 x 12-ounce cans frozen lemonade concentrate, thawed

* 2 cups spiced rum (optional)


Directions

1. Preheat oven to 250 degrees. Line a baking sheet with parchment paper; set aside.

2. In a medium bowl, mix together lemon juice and salt; set aside.

3. Peel apples and cut each in half through the stem; remove seeds and core. Using a sharp paring knife, carve a face, as desired, on the rounded side of each apple half. Place apples in lemon mixture for one minute; transfer to paper towels to drain.

4. Place apples, face-side up on prepared baking sheet and transfer to oven. Let bake until apples are dry and begin to brown around the edges, about 90 minutes.

5. Remove apples from baking sheets and press cloves into the “eye” sockets. 6. Combine cider, lemonade, and rum (if using) in a large punchbowl; float shrunken heads on top.


Have fun!


Tuesday, 8 October 2013

Because We Are All Earthlings ( Many languages )

Because We Are All Earthlings ( Many languages )

 photo 0a91ba88-282c-4260-bb15-aa4aa6e8a802.jpg


Other Nations (Earthlings Excerpt)

"We need another and a wiser and perhaps a more mystical concept of animals. Remote from universal nature, and living by complicated artifice, man in civilization surveys the creature through the glass of his knowledge and sees thereby a feather magnified and the whole image in distortion. We patronize them for their incompleteness, for their tragic fate of having taken form so far below ourselves. And therein we err, and greatly err. For the animal shall not be measured by man. In a world older and more complete than ours they move finished and complete, gifted with extensions of the senses we have lost or never attained, living by voices we shall never hear. They are not brethren, they are not underlings; they are other nations, caught with ourselves in the net of life and time, fellow prisoners of the splendour and travail of the earth." - Henry Beston, The Outermost House, 1928


Watch EARTHLINGS full Movie

EARTHLINGS is the single most powerful and informative documentary about society's tragic and unforgivable use of nonhuman animals, narrated by Joaquin Phoenix with soundtrack by Moby. Directed by Shaun Monson, this multi-award winning film by Nation Earth is a must-see for anyone who cares about nonhuman animals or wishes to make the world a better place.

Use the Captions button for subtitles in your language.

Subtitles / Captions currently available in 26 languages:

Arabic, Bulgarian, Chinese, Croatian, Czech, German, Greek, English, Estonian, Finnish, French, Galician, Hebrew, Hungarian, Indonesian, Italian, Polish, Portuguese, Portuguese-BR, Romanian, Russian, Serbian, Slovak, Spanish, Swedish, Turkish

Dutch version

Japanese subtitles

If you live in Germany and can't see, press this link

French version: Earthlings sous titres français bonne qualité

EARTHLINGS (Γήινοι) Greek Subtitles

Earthlings (Ziemianie) Polski Polish Subs

EARTHLINGS Terrícolas Subtitulos Español (Castellano)

EARTHLINGS (Terrestri) Sottotitoli Italiano

EARTHLINGS (Terráqueos) - Legendado Português

Earthlings (Pamantenii) - limba romana (Română -Romanian)

Find more subs on Veg tv info

If you are under 18 and not allowed to watch, press this link

For more information:

http://www.adaptt.org

http://www.chooseveg.com

http://www.30bananasaday.com

http://www.foodnsport.com

http://www.pcrm.org

http://www.veganbodybuilding.com

http://www.veganhealth.org


 photo mother-cow-and-calf.jpg


Sunday, 6 October 2013

Easy Homemade Hemp Milk And More

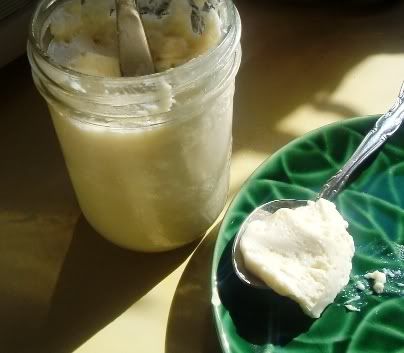
Cows milk has definitely been shown to be unhealthy in the most extensive scientific research [www.TheChinaStudy.com] not to mention there is probably more suffering in milk then there is in beef even. Here Peter shows us how to make Almond Milks, Sesame Seed Milk and most deliciously, super protein rich Hemp Milk. All of these provide more nutrition than dairy milk in a form your body can readily absorb and seeing as dairy is one of the most environmentally unfriendly products one can produce, one is doing the earth a huge favor in choosing these healthier, happier, kinder, greener, forest saving, delicious milks; and they are free if you grow your own!


Easy Homemade Hemp Milk And More

By Bryanna Clark Grogan, author of 8 published vegan cookbooks.

Hempmilk1 photo Hempmilk1.jpg

Hempmilk2 photo Hempmilk2.jpg

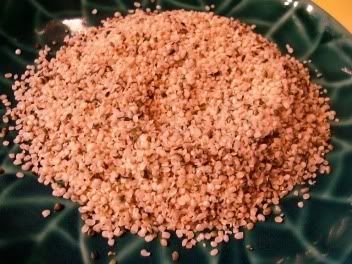
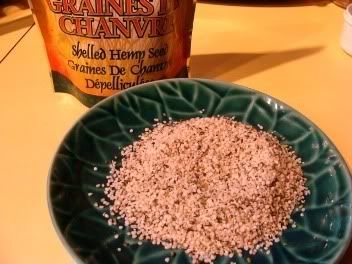
Shelled hemp seeds

The first recipe is for a very rich, creamy milk that could also be used like cream. It's fairly high in calories. The second recipe is a variation of that recipe, with half the calories and fat, but a nice light beverage. I hope you'll give it a try (maybe in one of the extra recipes that follow)-- it's easy and delicious.

Rich Homemade Hemp Milk Or Creme
Yield: 3 cups

This recipe produces a creamy, pleasant-tasting, rich white milk (or a light creme) with very little effort. When you strain it, there is very little residue-- just the green covering on the seeds that was left behind. I add some sweetener and salt so that it tastes more like dairy milk, which naturally contains sugar (milk sugars) and sodium.

This is a raw milk, so it must be used within a few days, and it needs to be shaken before use. You can double the recipe if you can use it up in that time. For a longer-lasting milk, double the recipe and make it in a soymilk maker that can be used with grains and seeds, such as the SoyQuick Premier Milk Maker 930P. Add the agave syrup and milk after straining the milk.

Ingredients
3 cups cold boiled or purified water
1/2 cup shelled hemp seeds (sometimes called "hemp nuts")
1 tablespoon agave nectar
1/4 teaspoon salt

Equipment: (scald everything with boiling water to sanitize before using)
1 blender
1 sieve or strainer
1 x 1 qt. pot or bowl that the strainer will fit into
1 square of white sheeting to line the strainer, with some overhang
1 whisk
1 x 3-4 cup mason jar with a tight lid

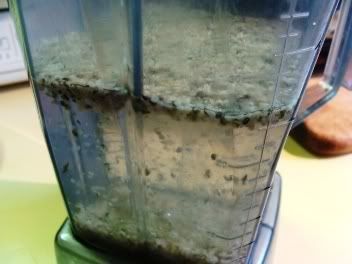
Place the water and shelled hemp seeds in the blender and blender on high speed for about 2 minutes.

Hempmilk3 photo Hempmilk3.jpg

Place the strainer or sieve inside of a pot or bowl, so that it rests on the edge and there is enough room underneath it to hold 3 cups liquid with some room to spare.

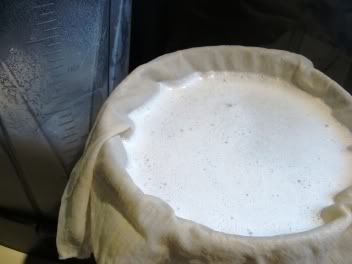
Pour the blended mixture into your strainer set-up. Let it drip for a few minutes, then bring the cloth up and twist it, squeezing and twisting and "milking" the cloth gently until all of the liquid is released.

Hempmilk4 photo Hempmilk4.jpg

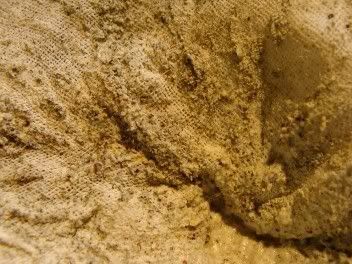
You should be left with a thin coating of greenish pulp on the inside of the cloth, which you can rinse off.

Hempmilk5 photo Hempmilk5.jpg

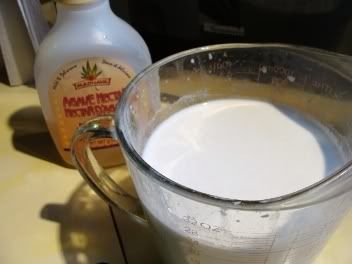
To the rich hemp milk in the bowl or pot, add the agave nectar and salt and whisk until dissolved.

Hempmilk6 photo Hempmilk6.jpg

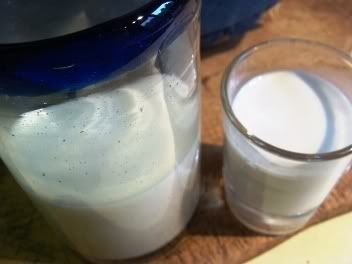
Pour the rich hemp milk into the jar, cover and refrigerate. The milk will separate in the refrigerator-- just shake the jar well before using.

Hempmilk7 photo Hempmilk7.jpg

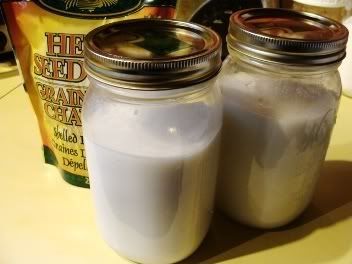
Lighter Hemp Milk on the Left, and Rich Hemp milk on the Right

Homemade Lighter Hemp Milk
Yield: 6 cups

This is a pleasant-tasting, light, white milk for drinking and cooking.

For a longer-lasting milk, make the recipe in a soymilk maker that can be used with grains and seeds, such as the SoyQuick Premier Milk Maker 930P. Add the agave syrup and salt after straining the milk.

Ingredients
3 cups cold boiled or purified water
1/2 cup shelled hemp seeds (sometimes called "hemp nuts")
3 more cups cold boiled or purified water
2 tablespoons agave nectar
1/2 teaspoon salt

Equipment: (scald everything with boiling water to sanitize before using)

1 blender
1 sieve or strainer
1 x 2 qt. pot or bowl that the strainer will fit into
1 square of clean white sheeting to line the strainer, with some overhang
1 whisk
2 x 3-4 cup mason jars with a tight lid, or a 6-cup glass jug with a lid

Place the strainer or sieve inside of a pot or bowl, so that it rests on the edge and there is enough room underneath it to hold 6 cups liquid with some room to spare.

Place the first 3 cups water and shelled hemp seeds in the blender and blend on high speed for about 2 minutes.

Pour the blended mixture into your strainer set-up. Let it drip for a few minutes, then bring the cloth up and twist it, squeezing and twisting and "milking" the cloth gently until all of the liquid is released. You should be left with a thin coating of greenish pulp on the inside of the cloth, which you can rinse off.

To the hemp milk in the bowl or pot, add the second 3 cups of water, the agave nectar and salt,and whisk well. Pour the hemp milk into the jar, cover and refrigerate. The milk will separate in the refrigerator-- just shake the jar well before using.

Hemp Milk Latte Or Mocha Latte
Servings: 1

Ingredients
1/2 cup freshly-brewed, hot espresso (can be decaffeinated)
1/2 cup Original or Vanilla commercial hemp milk, or homemade hemp milk (rich or light) , heated gently until almost boiling
Sweetener to taste, if desired

Mocha variation:
Use chocolate hemp milk

Mix your sweetener in a coffee cup with the hot espresso. Pour in the hot hemp milk, stir and enjoy!

Fruit Salad Hemp Shake
Servings: 2


Hempmilk8 photo Hempmilk8.jpg

Ingredients
1 1/2 cups Original or Vanilla commercial hemp milk, or homemade hemp milk
1 cup frozen sliced mixed fruits and berries (some stores have bags of frozen 5-fruit mixes)
1 medium frozen banana, cut into chunks
2 teaspoons organic sugar or agave nectar (optional)
1 tablespoon lemon juice
1 teaspoon pure vanilla extract

Blend everything in a Vita-Mix or blender until smooth. Serve immediately.

Hemp Milk Mayonnaise
Yield: 2 cups

Hempmilk9 photo Hempmilk9.jpg

This vegan mayonnaise is smooth, rich-tasting, and creamy, and a little tangy, but not too much. It is nice and white in color, too-- no green tinge from the hemp oil, surprisingly!

Ingredients
1/2 cup plus 2 tablespoon cold water
1/2 teaspoon agar powder
3 1/2 tablespoons cornstarch (do not substitute other starches-- you can buy organic cornstarch in health food stores and online)
1 cup homemade hemp milk (rich or light variety)
2 tablespoons vinegar (a light variety-- I use cider vinegar), or lemon juice
2-4 tablespoons hemp seed oil
1 1/2 teaspoons salt
3/4 teaspoon dry mustard powder

In a small saucepan or microwavable bowl ( one that holds at least 2 cups), mix together the water, and agar powder. Let the mixture soak for a few minutes.

While the agar soaks, place the cooked mixture and the hemp milk, vinegar, hemp oil, salt, and dry mustard in a blender or food processor.

Whisk the cornstarch into the agar mixture. Whisk the mixture together well. If you are using a saucepan on the stovetop, stir it constantly over high heat with a whisk at first, and then a wooden spoon, until it is very thick and translucent.

For the Microwave Option:
Add the cornstarch to the water and agar powder in the microwavable bowl, whisk together well, and microwave on full power for 30 seconds. Whisk. Repeat 2 times, or until very thick and transclucent.

Add the cooked mixture to the ingredients in the blender or food processor. Blend until the mixture is very smooth and you can't see any oil globules, which will take at least 2 minutes.

(NOTE: This mayo doesn't get thick as you blend it, like regular mayonnaise or soy mayonnaise made with lots of oil, so don't blend it and blend it, thinking it will thicken as it blends-it won't!! It will thicken after a few hours in the refrigerator.)

Scrape the mixture into a clean pint jar, cover and refrigerate until it is set.
Keeps several weeks.

Hempmilk10 photo Hempmilk10.jpg

Cooking Tips

VARIATION: Do you prefer Miracle Whip to mayonnaise? Try this:
Use 1 teaspoon mustard powder, and add 1 tablespoon lemon juice and 1 tablespoon organic sugar or agave nectar to the recipe (sugar levels in this type of recipe vary, so start with this and then let your taste dictate).

Animal Rights Links


Vegan Recipe & Cooking Links


Herbal & Garden Links


Martha Magenta's Poetry Links


General Topic Links


Friday, 4 October 2013

Beginning Vegans: Okay, Now What Do I Eat?

Beginning Vegans: Okay, Now What Do I Eat? By Howard Lyman

Howard Lyman1 photo HowardLyman-Copy.jpg

As you begin your transition to a more wholesome diet, remember that tastes for foods are learned. You may want to begin slowly, by replacing high-fat dairy products with fat-free versions and eating meat less often. However, making a complete break from animal foods is so rewarding that it's actually easier for most people.

Lyman2 photo Lyman2.jpg

All your needs for protein, calcium and other vital nutrients are easy to satisfy if you eat enough calories each day from a wide variety of foods. It's that simple! The only nutrient deserving extra consideration is Vitamin B-12, which, since it is made by bacteria, is not naturally present in plants (or meat). Your B-12 requirements can be easily met by including a cereal or soymilk fortified with B-12, or a B-12 supplement twice a week.

Step 1
Reduce or eliminate red meat, poultry and fish. Replace with health-supporting grain, legume and potato-based dishes. Or, start by giving yourself larger servings of rice, potatoes and vegetables at meals -- and ever smaller portions of meat.

Lyman3 photo Lyman3.jpg

Step 2
Increase intake of calcium-rich vegetables -- broccoli, kale, collards, mustard and turnip greens, bok choy, black beans, chick peas, calcium-processed tofu, calcium-fortified soymilk, calcium-fortified orange juice and blackstrap molasses. Choose more raw fruits and vegetables: cooking destroys nutrients. Try for 50% of your daily intake as uncooked foods and gradually increase the proportion. Buy organic.

Step 3
Reduce the "luxury" fats. Hydrogenated oils (like margarine) are artificially thickened vegetable oils that can damage your arteries and have been linked to some cancers. Gradually eliminate both butter and margarine from your diet. Reduce your use of cooking oils and oil-based salad dressings. Switch to nonfat (or low-fat) versions of prepared foods (and dairy products, if you still eat them). Read product labels. Replace eggs in baking with two tablespoons of water per egg -- or try Ener-G egg substitute.

Lyman4 photo Lyman5.jpg

Step 4
Replace dairy products with non-dairy foods. Delicious milks, cheeses, and frozen desserts based on soy, rice, nuts and seeds are available in health food stores and many grocery stores.

Step 5
Reduce refined carbohydrates (white flour, white sugar, white rice, etc.) by choosing whole grain products and natural sweeteners (fruits, juices, maple syrup, etc.)

It's easy! There is an endless supply of fabulous vegetarian recipes from many cultures - a wide variety of cookbooks are available in bookstores and health food stores.

There are several lines of fast foods -- pilafs, falafels, humus, "burgers," "tofu-helpers," etc -- for sale across the country - If you can't find them in your store, ask your grocer to carry them -- she or he is always looking for suggestions. Ask your favorite restaurant to serve vegan burgers, past dishes, etc.

Lyman5 photo Lyman7.jpg

Here are some more ideas for Breakfast, Lunch, Dinner, Drinks and Snacks:

Breakfast

Cereal Lovers - Try hot or cold whole grain cereal or granola with soy milk and fruit.

Use maple syrup or honey instead of sugar. Try apple juice on granola -- it's great!

Bread Lovers - Try whole grain bread, toast, bagels, non-dairy muffins or specialty breads, with raisins or dates and nuts or seeds. Remember, even soy margarines have just as much fat as butter. Try apple butter, pure fruit jams, nut butters, humus or tahini on your bread or bagel.

Egg Lovers - Don't knock scrambled tofu until you've tried it. There are easy mixes put out by several companies, as well as recipes in vegetarian cookbooks. Try sautéing cubed firm tofu with anything you would add to an omelet.


Other breakfasts - Treat yourself to waffles or pancakes made with soy milk -- try using ½ banana in place of each egg -- and smothered in fresh or hot cooked fruit.

Make fruit smoothies with everything you can imagine. Use sweet fruit to make breakfast cobbler or pie and you won't need to add sugar when baking.

 photo 6fd19619-3245-4a44-8b69-353361db29b0.jpg

Lunch or Dinner

Sandwiches - Whole grain breads, avocado, grated carrots, sprouts, lettuce, tomatoes and thinly sliced cucumbers make great sandwiches. Try nut butters with pure fruit jams or humus with crisp sliced vegetables. Vegetarian cookbooks have great recipes for spreads. Falafel is delicious.

Salads - Most vegetables can be served raw, chopped small or grated in salads. Cooked beans (garbanzos, kidney, black, lentils, etc. ), sprouts, seeds, nuts and avocados are excellent. Try salad dressings with little or no oil and/or flavored vinegars. Stuff your salad into pita bread and add tahini to it.

Pasta - Try all those special pastas made with wholesome grains, vegetables and spices. Experiment with marinara, pesto and tomato basil sauces. Try sautéing garlic, onions, summer squash, red bell peppers and tomatoes in a little olive oil -- or in a little sesame oil and tamari (soy sauce).

Burritos or Tacos - Try beans (black beans are great), rice or potatoes, avocado, tomatoes, lettuce or crisp shredded cabbage, salsa, soy cheese, etc. Use soft corn or whole wheat tortillas. Find your own favorite combinations -Nachos con todo (with everything) is a great fast meal.

Potatoes - Potatoes can be baked, steamed, mashed or home-fried. Try them with sauces, salsas, mustard, in soups or salads. Treat yourself to mushroom gravy. Remember yams and sweet potatoes.

Veggie or Tofu Burgers - There are many varieties in stores. They are delicious and easy to bake, fry, barbecue or microwave. Tofu hot dogs are almost indistinguishable from the original. Pile on the lettuce, tomatoes, onions, pickles, ketchup, mustard, tofu mayo and barbecue sauce

Vegetables - Try stir-fried or steamed, served with brown rice, millet, barley or potatoes. Add cubed firm tofu and tamari or mushroom gravy for a feast.

Pizza - Use whole wheat crust, tomato sauce, spices, soy cheese, and all your favorite trimmings. Try almonds, garlic, and fresh tomatoes.

Soups - Beans, lentils, nuts, veggies, grains, potatoes, tofu -- anything is good in soup. Simmer your favorite vegetables for a few minutes and add a little miso for a quick treat. There are many brands of instant soups made with wholesome an delicious ingredients -- just add boiling water, stir and wait.

Lyman7 photo Lyman9.jpg

Drinks and Snacks

Milks - Soy, rice, nut or seed milks are perfect substitutes for cow and goat milk-Carob, chocolate and vanilla versions are delicious. Watch out -- some have added oils that make them just as high in fat as cow milk

Juices - Many bottled organic juices are available all across the country. Look for local fresh-squeezed brands. Juice your own. Many vegetable juices are just as delicious as fruit juices. Be daring -- carrot juice can be habit-forming.

Water and Tea - Add sliced lemons, limes, oranges or tangerines to fresh clean water. Try herbal iced teas and hot teas.

Snacks - Go for crispy foods like popcorn, pretzels, chips, fresh fruit, carrots, nuts, seeds and celery with almond butter. Enjoy cobblers and pies made from sweet fresh fruit, smoothies, non-dairy cookies and muffins, dried fruit, frozen fruit bars and non-dairy frozen desserts like Rice Dream and Tofutti. Avoid preservatives and buy organic.

Eat lower on the food chain - it's healthy, environmentally sound, economical, fun and delicious.

Lyman8 photo Lyman4.jpg

"People always ask me, like, what do you eat? Well, just about everything else. There are a lot of things that aren't meat." - 12th grade student.

"I hear Bill Clinton talk about the budget and how he wants to help by giving people money for health benefits, and stuff about the hospitals and I just think that if he sent out the word that if you just changed your eating habits just a little bit, it will help your health so much." - 10th grade student.

"I just don't like eating meat as much because it's not very good for you and when you know what's in that you won't want to eat it either - 6th grade student."

Lyman9 photo Lyman8.jpg

Howard Lyman1 photo Hlyman.jpg

************

Recipes

Soft Pumpkin Pretzels

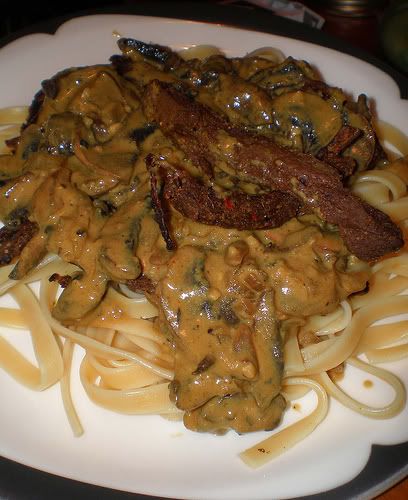
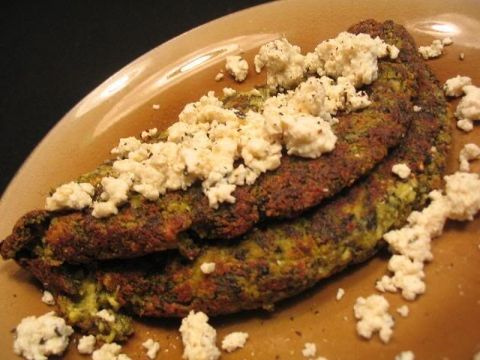
Fried Tofu 'n Biscuits with Gravy

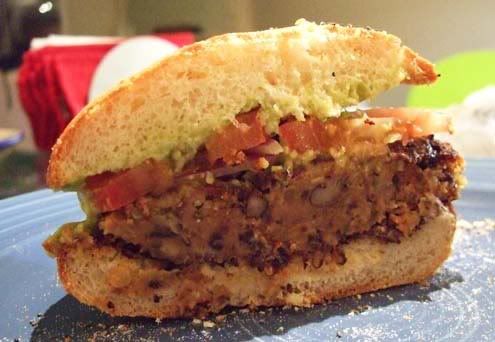
Butter Bean Burger

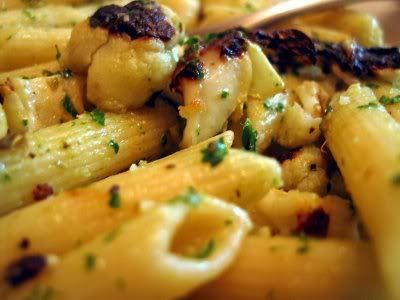
Penne with Caramelized Cauliflower

Mango Cherry Smoothie

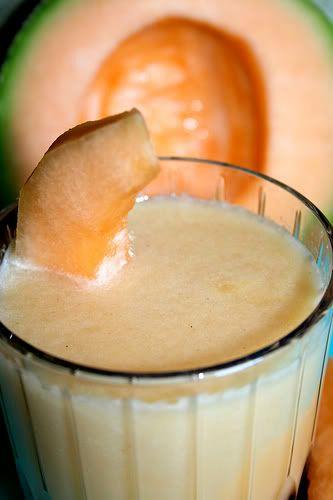
Creamy Cantaloupe Milk

Vegan Baked Ziti

Buffalo Chikn Pizza

Maple Corn Fritters

Vegan Chocolate Chip Brownie Waffles

Chinese Take Out Burgers

Double-Layer Pumpkin Cheesecake

Sites to visit

Vegan Lunch Box

What The Hell Does A Vegan Eat Anyway?

How Mary and Frank and Friends Eat

Compassionate Cook

More Vegan Products

Vegan Cookbooks

Vegan Chocolates

Galaxy Cheese

Vegan Gourmet Cheese

Follow Your Heart

Turtle Island Products

May Wah Healthy Vegetarian Food Inc.

The Vegan Store

Vegan Feast Kitchen

Squirrels Vegan Kitchen

Read about Howard Lyman and why he changed

We're killing the planet, and ourselves.

Howard Lyman

Straight Talk from a Former Cattleman

MAD COWBOY: Plain Truth from the Cattle Rancher Who Won't Eat Meat

Veganism is the future


Animal Rights Links


Vegan Recipe & Cooking Links


Herbal & Garden Links

Martha Magenta's Poetry Links

General Topic Links