Monday 30 September 2013

How to grow an organic herb garden

How to grow an organic herb garden


Music: A Path To Solitude by Dan Gibson


Photobucket


There are few activities more rewarding than growing an herb garden. There are countless things that you can do with fresh, frozen and dried herbs, including culinary and medicinal uses, and many arts and crafts. You can even make your own health and beauty products. And if you like herbs you will find they are very willing to grow for you. I love my herb garden. I can go out there every day and get something fresh and organic to eat, drink or to use in cooking and salads. I store up abundant harvests of dried and frozen herbs to last all winter. All the while the beauty and aromatic smells of wonderful herbs surround me.

Formal herb garden

Photobucket


There are two basic types of herb garden -- formal and informal. To grow a classic formal herb garden requires a good deal of open space and hard work. It is an attractive way to put a large patch of unused ground to good use. Formal herb gardens are symmetrical and divided into sections by neatly clipped box hedging in a designed pattern. If you want a formal herb garden, you need to plan carefully before you start. Read a book on how to plan and create a formal herb garden.

The Royal Horticultural Society 'Encyclopedia of Herbs & Their Uses' gives well-illustrated formal herb garden designs.

Informal herb garden

Photobucket


My style of herb gardening is of the informal kind. I like to work with nature rather than impose a pre-ordained plan. That way I don't miss out on the abundance of natures gifts -- the wild herbs that grow so easily. Besides, herbs have a way of growing where they want to and not always where you want them.

When I moved into a city cottage, I found the garden hard, stony and small. One day, when I was struggling to dig through the hardcore, a neighbour called out: "You'll never get anything to grow there!" How wrong he was! Herbs will readily grow where many other plants won't. My garden today is stuffed full of the foliage and flowers of herbs!


Photobucket

Include some fruit, vegetables and flowers that you like.

Photobucket

Blackcurrant Ribes nigrum

It is a good idea to have some easy-to-grow food supplies. My herb garden is enhanced in summer by colourful runner beans growing up the wall, and yellow trumpets of courgette flowers reaching for the morning sun. I also have tomatoes, rhubarb, spinach, pak choi, cress, cabbages, and a blackcurrant bush that gives me lots of nutritious fruit and delicious leaves for herbal teas.


Photobucket

Marigold Calendula officinalis

It's your herb garden so put what you like in it. Add some colourful flowers to attract bees. Pot marigolds (the calendula variety) truly belong in an herb garden. Use attractive shrubs and roses for a backdrop or hedge. If you have a rock garden you can grow assorted thymes amongst alpines.

Wild Herbs

Photobucket

Dandelion Taraxacum officinale

You will probably find valuable herbs growing naturally in your garden, such as dandelions, nettles, herb Robert, cleavers, chickweed and plantain. Instead of seeing them as weeds and digging them out, reserve space for them to grow. Dandelions have many uses: they can be used as greens, in salads, oils and vinegars, and the flowers make a nice addition to herbal tea; herb Robert is decorative and also useful in teas, so cut and dry it; gather in the cleavers too and dry them so they don't choke your herbs; chickweed is best cut regularly while tender and used in salads or as greens.


Photobucket

Nettle Urtica dioica

Allow nettles to grow, using just the tops, then cut them right down before they go to seed and dry them. This way you will have a supply of nettles each year and they will grow again in spring. These wild plants are all excellent food sources and remedies.

Growing herbs in containers and pots

Photobucket


Many herbs grow happily in large terracotta pots. This is a good idea if you have a small space, patio or courtyard. Some herbs prefer this protection from the elements and garden predators. Pots look attractive in brackets on a wall. You can use an old porcelain sink (stand it on bricks near the door), teapots, bathtubs, barrels, troughs and wheelbarrows. I have even seen a colourful herb garden grown in an old convertible car!


Photobucket

Nasturtium Tropaeolum majus

You can create more space with terraced raised beds. Climbing and trailing plants such as nasturtiums, sweetbriar rose, honeysuckle and hops look attractive climbing up trellises, walls, pillars and frames. From these you can hang baskets with herbs such as marjoram, thyme, and pennyroyal trailing over the sides. Make sure the plants are regularly watered so they don't dry out.


Photobucket

Bay Tree Laurus nobilis

I started my herb garden with a few of my favourite herbs in small pots that I bought from the garden centre -- oregano, sage, a bay tree, and two rosemary bushes. As they grew I potted them on. Now the rosemary bushes form part of the hedge, providing continual fresh herb and an abundant supply of dried rosemary for the winter. I have propagated the bay tree from cuttings, so now I have three. I divided the oregano so it grows in a pot and in the ground so it can spread. Along the hedge with the rosemary grow lavender, marjoram, lemon balm, hawthorn and blackcurrants.


Photobucket

Lemon verbena Aloysia triphylla

In the next row I have pots containing chives, winter savoury, sage, bay, marigolds, and lemon verbena. In front of those, on the ground I have thyme, peppermint, spearmint, chamomile, rocket, bergamot mint, prunella, and strawberries. The woody plants such as rosemary, lemon verbena, bay and sage continue to grow year after year. The mints, chamomile, self-heal, thyme, lemon balm and oregano are perennials and grow every year. Some herbs such as basil, dill, parsley and chervil need to be re-sown from seed each year.


Chamomile, Roman (Anthemis nobilis)

Roman Chamomile Anthemis nobilis

Growing herbs from Seed

Many herbs are easy to grow from seed, such as marjoram, oregano, thyme, dill, parsley, basil and rocket. Start the seeds in spring in small pots of clean,organic compost in a sunny windowsill. Keep them well watered and protected from the cold. As they grow pot them on into bigger pots.


Oregano (Origanum vulgare)

Oregano Oreganum vulgare

After the frosts, plant the marjoram, oregano, thyme and rocket outside. First soak the plants so they slide out of the pots easily. Dig holes deep enough to fully cover the roots, add a little compost, and firm the soil gently around the roots. Water well in. You might want to plant herbs in outdoor pots to protect them from slugs and snails.

Garden Compost

compost


Save all your cuttings, weeds, household waste, peelings and vacuum cleaner contents and put them in a compost bin or heap. It is essential to recycle this goodness so that your plants and the soil they grow in get fed as well as watered. My garden is organic, so I never use any artificial chemical fertilisers, weed killers or chemical insecticides.


Photobucket

Wood Pigeon

While I work, or sit and enjoy my herb garden, I feel that I am receiving a wonderful healing as I listen to the beautiful song of the resident blackbird. There are a variety of different birds in the trees including great tits and a pair of nesting wood pigeons. From time to time squirrels come to visit. They scream and thrash their tails at the cats, and fly off again, leaping from branch to branch. This makes living in the city bearable. The trees give me a sense of permanence, while the concrete jungle of the city is transient.

No garden at all?

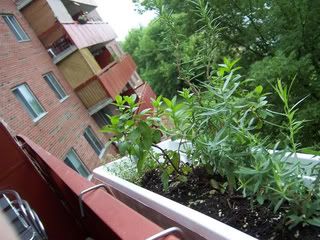
If you live in an apartment and have no garden at all, you can successfully grow most herbs on windowsills, balconies, window boxes or even the garage roof.


Photobucket

Growing herbs indoors

I have found that some herbs such as parsley, basil and chervil sometimes don't do so well outside due to slugs and insects. If this happens I keep the plants indoors in the window. This gives me a continual supply for cooking and salads. The basil does so well that I can freeze it and use it in soups and pesto during the winter.


Photobucket


Stand the pots on a windowsill, or a table next to the window, on trays or saucers of gravel for drainage. Make sure the plants get enough light and air. Feed them with plant food, mulch or compost from time to time. Before watering the herbs, allow the water to warm to room temperature. On hot days stand the plants back, so the heat of the sun does not burn them. Turn the pots around a little each day so the herbs grow evenly. The herbs can be used as they are growing by picking the tops of the plants. This makes them bush out and grow thicker and stronger.

Happy gardening!

© Martha Magenta

* 'Encylopedia of Herbs', The Royal Horticultural Society, Deni Bown, 1995, ISBN 0-7513-020-31, Dorling Kindersley, London.


Animal Rights Links


Vegan Recipe & Cooking Links


Herbal & Garden Links


Martha Magenta's Poetry Links


General Topic Links


Saturday 28 September 2013

More Delicious Autumn Pumpkin Recipes

More Delicious Autumn Pumpkin Recipes


Pumpkin Pasta With Easy Alfredo Sauce

By Vegan Dad


PumpkinPasta1 photo PumpkinPasta1.jpg


Ingredients

1 lb pumpkin pasta (see recipe below)
- 3 cloves garlic, skins on
- 3 tbsp margarine
- 2 generous tbsp flour
- 1 tsp sage
- 1/4 tsp thyme
- pinch of nutmeg
- 1 tsp salt
- 2 cups soy milk
- 1 cup firm silken tofu

Instructions

1. Cook pasta in rapidly boiling salted water for about 60 seconds, until soft but still firm.
2. While water is heating, make sauce. Dry roast garlic in a pan until soft. Remove from heat, remove skins, and chop.
3. Heat margarine in a saucepan over medium heat. Whisk in flour and bring to bubbling. Add garlic and spices and mix, then whisk in soy milk. Bring to bubbling, whisking regularly.
4. Add tofu and blend with a hand blender. Adjust seasonings to taste. Mix with cooked pasta and serve.

Fresh Pumpkin Pasta

PumpkinPasta2 photo PumpkinPasta2.jpg

Ingredients

Makes 1 lb of pasta

-1 cup semolina flour
- 1 cup all purpose flour
- 1/2 tsp sea salt
- 1/2 cup pureed cooked pumpkin
- 1-2 tbsp water

Method

1. Mix together flours and salt in a bowl. Make a well in the center. Put pumpkin and 1 tbsp of the water in the center. Slowly incorporate the wet into the dry, making a rough dough, adding more water if needed.
2. Turn out dough onto a lightly floured surface and knead into a smooth dough (5 mins). It's going to take some elbow grease. The dough should not break apart or crack, so wet your hands if the dough seems too dry.
3. Roll into a log and wrap in a damp towel. Set aside for 20 mins to let the dough relax. Roll and cut as per usual.

A Note on Cooking Fresh Pasta:
Fresh homemade pasta does not need to cook very long--1-3 mins, usually, depending on the thickness. Monitor the pasta closely and make sure you don't overcook it, otherwise it will be mushy.

Enjoy!


Pumpkin Pie Brownie

By Vegan Cupcakes Takes Over The World.

PumpkinPieBrownie photo PumpkinPieBrownie.jpg


Note: A 15 or 16 ounce can of pumpkin will equal the 2 cups of pumpkin needed for this recipe.

Ingredients:

For the brownie layer

4 ounce bittersweet chocolate, melted
1 cup canned or pureed pumpkin
3/4 cup sugar
1/4 cup vegetable oil
1 teaspoon vanilla extract
3/4 cup flour
1/4 cup dutch processed cocoa powder
1 tablespoon tapioca flour (or arrowroot or corn starch)
1/4 teaspoon baking soda
1/4 teaspoon salt

For the pumpkin pie layer

1 cup canned or pureed pumpkin
2 tablespoons tapioca flour (or use arrowroot or cornstarch)
1/2 cup non-dairy milk (I used soy)
1/3 cup sugar
1 teaspoon vanilla extract
1/4 teaspoon ground ginger
1/4 teaspoon ground cinnamon
pinch ground nutmeg
pinch ground allspice

To decorate:

A handful of chocolate chips.

Directions:

Preheat oven to 350 F. Grease a 9 inch springform pan, or use a 9 inch square pan, preferably lined with parchment paper.

To make the brownie layer:

Melt the chocolate

In a large mixing bowl mix together pumpkin, sugar, oil and vanilla. Sift in the flour, cocoa powder, tapioca, baking soda and salt and stir to combine, then mix in the melted chocolate.

To make the pumpkin layer:

Mix all ingredients in a large mixing bowl and stir until thoroughly combined.

To assemble:

Use a spatula to spread the brownie layer into the prepared baking pan, taking care to bring the batter to the edges of the pan. Pour the pumpkin layer over it, leaving a little room at the edges if you can. Bake for 30 minutes, until the pumpkin layer looks fairly firm (a little jiggling is okay) and has cracked at the edges a bit.

Let cool for 20 minutes and then transfer to the fridge to set for at least an hour and a half. Once set, decorate with chocolate chips and serve.

Enjoy!

From Caroline's Garden of Vegan.

Animal Rights Links


Vegan Recipe & Cooking Links


Herbal & Garden Links


Martha Magenta's Poetry Links


General Topic Links


Thursday 26 September 2013

Loads Of Autumn Recipes

Loads Of Autumn Recipes


autumn veg photo Autumnveg.jpg


 photo roastedtampenado1.jpg


 photo 4f68a579-86da-4241-92d2-f29c2b49536b.jpg


Vegan Mac-n-Cheese photo mac-n-cheese.jpg


Tofu Pot Pie photo TofuPotPie.jpg


Roasted Pumpkin Seeds photo RoastedPumpkinseeds.jpg


Warm Winter Salad photo WarmWinterSalad.jpg


Pasta-free Pumpkin Lasagna photo Pasta-freePumpkinLasagna.jpg


Creamy Potato, Leek soup photo CreamyPotatoLeeksoup.jpg


Photobucket


Thanksgiving Burgers 600 photo bcc4afb2-c3b8-46f0-b2c9-86454e2fc9fa.jpg


Wednesday 25 September 2013

Homemade Pumpkin Pie with Gingersnap Crust

Homemade Pumpkin Pie with Gingersnap Crust

By Happy Healthy Life - Kathy
Makes one 9-inch deep dish pie or two 8-inch shallow pies.


Pumpkin pie1 photo Pumpkinpie1.jpg


Crust:

10-15 homemade gingersnaps (recipe below)
2-3 Tbsp vegan buttery spread

Filling:

2 3/4 cups squash/pumpkin puree (strained) (1 large or 2 small pumpkins, see notes)
2 tsp sea salt
1/2 cup sugar
1 tsp vanilla extract
1/4 cup maple syrup
2 Tbsp pumpkin pie spice
1 tsp ground ginger
1/2 tsp cinnamon
3/4 cup tofu/soy cream cheese
1 1/4 cups raw cashews, soaked

Garnish:

30-40 soaked raw cashews
2 Tbsp maple syrup
pinch of salt

Recipe notes:


* Since you will need cashews for both the filling and the garnish, remember to soak around 2 cups of dry cashews. It is better to have leftovers than to come up short.
* You can use either all pumpkin, all butternut squash, a cushaw squash or a mixture of squashes. I used 1 small butternut squash and 1 small sugar pumpkin for a filling mix.
* When you scoop out the flesh of the squash, you will have at least double what the end product will be. Straining the squash will remove a lot of the water content - so when you measure, use the strained squash amount.
* The gingersnap recipe is the same as linked to - the only difference is that you will chill the cookie dough, then thinly roll it out and cut into circles - so that you can get crisp cookies. You can bake the cookies until they have browning edges. Crisp cookies make a better crust that soft chewy cookies.
* You can modify the ratio of cream cheese to cashews if you'd like. Adding more cream cheese will give your pie a more 'cheesecake' taste.

Directions:

Pre:
At least 8 hours before: soak your raw cashews in a salted water bath.

1. The first step is the get your pumpkin/squash roasted. Heat your oven to 400 degrees. Slice and de-seed your squash and/or pumpkin. I lay my squash face down in a shallow water bath for roasting. But you can dry-roast if you'd like. I roasted my squash for 60 minutes. Roasting time will depend on how large your pumpkins are. When squash have roasted, pull them from the oven to fully cool before handling. When they are fully cooled, scoop out the flesh. Then pour the flesh into a fine cheesecloth and squeeze out excess moisture. When you are left with a dry puree (dry enough to hold its shape in a ball) you can measure out the 2 3/4 cups of squash. Set aside. Note: some recipe say you can puree the pumpkin first, but I simply wait to puree it with the rest of the ingredients.

2. The next step is to make the gingersnaps. You can do this the night before you make your pie if you'd like. Follow my recipe for ginger cookies - only for the last step, you will chill the dough for about 30 minutes. Then roll the dough out thinly so you can get crisp baked cookies. Bake the cookies until the edges brown. Then chill the cookies completely. Stick them in the freezer for fast chilling.

3. Once the cookies are chilled you can make your crust. Combine 10 cookies in your food processor with 2-3 Tbsp of chilled vegan buttery spread. Pulse until the crumbs are finely ground and mixed with the spread. Pour the crumbs into your pie tin and press into place with your fingers. Note: if you are using two shallow pie tins, you may need to increase the amount of crumbs, so you will need 15 cookies to crush. (also depends on size of your cookies).

4. In a 400 degree oven, bake your crust for about ten minutes - until the crumbs get darker brown and crisp. Set the pie crust aside to cool.


Pumpkin pie2 photo Pumpkinpie2.jpg

Gingersnap crust

5. Now that you have your squash puree, your crust and your cashews soaked, you can start the easy part! In a food processor, combine the tofu cream cheese, soaked cashews, cinnamon, 1 tsp salt (half of total) and maple syrup. Puree until very smooth. Scoop out about 1/2 cup of this mixture and set aside. Leave the rest of the mixture in the food processor.

6. Next, add in all the remaining pie filling ingredients (squash/pumpkin puree, vanilla extract, all the spices, remaining salt and sugar. Puree until smooth and creamy.

7. Make sure the oven is preheated to 400 degrees.

8. Pour the pie filling over the gingersnap crust. Smooth out with the back of a spoon.


Pumpkin pie3 photo Pumpkinpie3.jpg


9. Grab your reserved cream cheese/cashew mixture and swirl that into the top layer. You can swirl it so it blends into a soft orange color, or keep it in true orange/white swirls. I like to make a design using a fork. The mixture should be thick enough so that a fork brushed over top, will leave a pattern.

10. Lastly, soak about 30-40 leftover cashews in maple syrup and a pinch of salt. (Make sure the cashews are well drained and dry so that they absorb some of the maple flavor.) Line the cashews around the edge of the pie and one in the center.


Pumpkin pie4 photo Pumpkinpie4.jpg


11. Bake at 400 degrees for the first 15 minutes. Then turn the heat down to 350 and bake for another 20-30 minutes. If you want a softer, custard-y pie, bake less. If you want a firmer, drier pie bake longer.

12. Chill in the fridge before serving. Enjoy and (pat yourself on the back) good job!!!


Molasses Ginger Cookies


Vegan, makes 20 cookies


 photo gingersnaps.jpg


Ingredients

2 cups flour
1/2 cup sugar
1 1/2 Tbsp ginger powder
1 Tbsp fresh grated ginger
1/4 cup water (see notes)
1/4 - 1/3 cup molasses
1/3 cup melted vegan buttery spread
3/4 tsp salt
1/2 tsp cinnamon
1 tsp vanilla extract
1/2 tsp baking soda
2 tsp baking powder

Notes:
* I used white whole wheat flour from Trader Joe's. Any flour variety will work though.
* Adding more molasses will make the cookies darker and bolder. But don't add more than 1/2 cup - because the flavor will be too strong. Molasses is bold.
* If you substitute the butter spread with vegetable oil, add in an extra dash of salt.
* If your dough seems too dry - simply add water in 1 tsp intervals until the dough meshes perfectly - in a Playdough like consistency.

Directions

1. Preheat the oven to 375 degrees.

2. Soften the vegan butter spread in the microwave. Set aside.

3. In a large mixing bowl, combine the dry ingredients: flour, sugar, ginger powder, cinnamon, salt, baking soda/powder. Mix well.

4. In a separate bowl, combine the softened buttery spread, molasses, vanilla extract, grated ginger and water.

5. Combine the wet and dry ingredients and stir by hand well until all the ingredients are blended into a moist ball of dough. The dough will seem dry at first, but keep stirring and folding and it will come together. If needed add in extra water one spoonful at a time until the dough consistency is reached.

6. If you want perfectly shaped ginger cookies, you can freeze the dough for 1/2 hour then roll out the dough to cookie cutter circle shapes for baking. Or you can simply roll the dough into moist balls, dip in a coating of sugar and bake. I tried both versions and was pleased with both. (If you want crunchier, thinner Gingersnaps - roll the dough out thin, cut into thin circle shapes and bake.)

7. Bake at 375 for 9 minutes.

8. Allow the cookies to cook at least 15 minutes before serving. They will harden as they cool as well as overnight.


Monday 23 September 2013

The Facts About Declawing Cats

The Facts About Declawing Cats


600 photo cd7aeb1b-3383-4fd9-a0fc-315192694403.jpg


Feline Amputation (Onychectomy) - What You Really Need To Know


The Cat

The cat is born with claws as a means of defense. Large cats and small cats use their claws to hunt, to dig, and to fight. Taking a cat's claws away from them, leaves them defenseless, and will lead to death if the animal is left outside. If you are thinking about having your cat de-clawed, think of this first: How would you survive if you had no fingers?


The Cat's Claws

Unlike most mammals who walk on the soles of the paws or feet, cats are digitigrade, which means they walk on their toes. Their back, shoulder, paw and leg joints, muscles, tendons, ligaments and nerves are naturally designed to support and distribute the cat's weight across its toes as it walks, runs and climbs. A cat's claws are used for balance, for exercising, and for stretching the muscles in their legs, back, shoulders, and paws. They stretch these muscles by digging their claws into a surface and pulling back against their own clawhold - similar to isometric exercising for humans. This is the only way a cat can exercise, stretch and tone the muscles of its back and shoulders. The toes help the foot meet the ground at a precise angle to keep the leg, shoulder and back muscles and joints in proper alignment. Removal of the last digits of the toes drastically alters the conformation of their feet and causes the feet to meet the ground at an unnatural angle that can cause back pain similar to that in humans caused by wearing improper shoes.


Understanding Declawing (Onychectomy)

Declawing 600 photo b48a6a24-972a-4da0-ad7e-24d9d6f667e6.jpg

The anatomy of the feline claw must be understood before one can appreciate the severity of declawing. The cat's claw is not a nail as is a human fingernail, it is part of the last bone (distal phalanx) in the cat's toe. The cats claw arises from the unguicular crest and unguicular process in the distal phalanx of the paw (see above diagram). Most of the germinal cells that produce the claw are situated in the dorsal aspect of the ungual crest. This region must be removed completely, or regrowth of a vestigial claw and abcessation results. The only way to be sure all of the germinal cells are removed is to amputate the entire distal phalanx at the joint.

Contrary to most people's understanding, declawing consists of amputating not just the claws, but the whole phalanx (up to the joint), including bones, ligaments, and tendons! To remove the claw, the bone, nerve, joint capsule, collateral ligaments, and the extensor and flexor tendons must all be amputated. Thus declawing is not a simple, single surgery but 10 separate, painful amputations of the third phalanx up to the last joint of each toe. A graphic comparison in human terms would be the cutting off of a person's finger at the last joint of each finger.

Declaw 600 photo db139093-d026-490f-99f0-f49e7fa7b7b6.jpg

Many vets and clinic staff deliberately misinform and mislead clients into believing that declawing removes only the claws in the hopes that clients are left with the impression that the procedure is a "minor" surgery comparable to spay/neuter procedures and certainly doesn't involve amputation (partial or complete) of the terminal-toe bone, ligaments and tendons. Onychectomy in the clinical definition involves either the partial or total amputation of the terminal bone. That is the only method. What differs from vet to vet is the type of cutting tool used (guillotine-type cutter, scalpel or laser).


Onychectomy (Declawing) Surgery

Contrary to misleading information, declawing is not a "minor" surgery comparable to spaying and neutering procedures, it is 10, separate, painful amputations of the distal phalanx at the joint (disjointing).

"The claw is extended by pushing up under the footpad or by grasping it with Allis tissue forceps. A scalpel blade is used to sharply dissect between the second and third phalanx over the top of the ungual crest . The distal interphalangeal joint is disarticulated (disjointed), and the deep digital flexor tendon is incised (severed). The digital footpad, is not incised. If a nail trimmer is used, the ring of the instrument is placed in the groove between the second phalanx and the ungual crest. The blade is positioned just in front of the footpad. The blade is pushed through the soft tissues over the flexor process. With the ring of the nail trimmer in position behind the ungual crest, the blade is released just slightly so that traction applied to the claw causes the flexor process to slip out and above the blade. At this point, the flexor tendon can be incised and disarticulation of the joint (disjointing) completed. Both techniques effectively remove the entire third phalanx." (Excerpted from: Slatter D; Textbook of Small Animal Surgery 2nd ed vol I, p.352 W.B. Saunders Company Philadelphia.)

pic1 photo pic1.jpg

pic2 photo pic2.jpg

pic3 photo pic3.jpg

pic4 photo pic4.jpg

pic5 photo pic5.jpg

pic6 photo pic6.jpg


Complications

Declawing is not without complication. The rate of complication is relatively high compared with other so-called "routine" procedures. Complications of this amputation can be excruciating pain, damage to the radial nerve, hemorrhage, bone chips that prevent healing, painful regrowth of deformed claw inside of the paw which is not visible to the eye, and chronic back and joint pain as the shoulder, leg and back muscles weaken.

Other complications include postoperative hemorrhage, either immediate or following bandage removal is a fairly frequent occurrence, paw ischemia, lameness due to wound infection or footpad laceration, exposure necrosis of the second phalanx, and abscess associated with retention of portions of the third phalanx. Abscess due to regrowth must be treated by surgical removal of the remnant of the third phalanx and wound debridement. During amputation of the distal phalanx, the bone may shatter and cause what is called a sequestrum, which serves as a focus for infection, causing continuous drainage from the toe. This necessitates a second anesthesia and surgery. Abnormal growth of severed nerve ends can also occur, causing long-term, painful sensations in the toes. Infection will occasionally occur when all precautions have been taken.


Laser Declawing Cruelty

Burnt tissue from laser declaw photo Bad_Declaw_Necrotic_1.jpg

Burnt tissue from laser declaw

Just like a scalpel, the laser is used to amputate the last bone of each of the cats's toes. Laser surgery has its own risks. This cat's tissue was overheated by the laser, resulting in exposed bone and necrotic tissue. The cat needed four additional surgeries before the wounds healed.

Bad declaw postop photo Bad_Declaw_post-op_WEB.jpg

Secondary declaw surgery

This poor cat suffered for months with horrible infections and osteomyelitis. The second vet had to remove dead soft tissue and bone, including an entire toe from the paw on the right. The cat survived, but was permanently lame.

 photo Declaw_domestic_WEB1.jpg

X-ray showing displaced bone fragments

This is a x-ray image of a typical declawed domestic cat paw. The retained fragment of the toe bone in a relatively normal anatomic position is indicated by arrow "A". "B" shows the fragment has been pulled under the paw by the tendon that is still attached. In this position, the fragment is situated between the remaining second toe bone and the pad, where it acts like a painful pebble-in-the-shoe.


 photo pic8.jpg

 photo pic9.jpg

 photo pic10.jpg

 photo pic11.jpg

 photo pic12.jpg

 photo a7ebfc61-bf26-466a-aca6-3258c18a7ddf.jpg


Psychological & Behavioral Complications

Some cats are so shocked by declawing that their personalities change. Cats who were lively and friendly have become withdrawn and introverted after being declawed. Others, deprived of their primary means of defense, become nervous, fearful, and/or aggressive, often resorting to their only remaining means of defense, their teeth. In some cases, when declawed cats use the litterbox after surgery, their feet are so tender they associate their new pain with the box...permanently, resulting in a life-long adversion to using the litter box. Other declawed cats that can no longer mark with their claws, they mark with urine instead resulting in inappropriate elimination problems, which in many cases, results in relinquishment of the cats to shelters and ultimately euthanasia. Many of the cats surrendered to shelters are surrendered because of behavioral problems which developed after the cats were declawed.


Risk factors for relinquishment of cats to an animal shelter:

"Among 218 cats relinquished to a shelter, more (52.4%) declawed cats than non-declawed cats (29.1%) were reported by owners to have inappropriate elimination problems."
Source: World Small Animal Veterinary Association - 2001

The incidence of behavior problems following onychectomy in cats; two months to five years (median 11.5 months) after surgery:
"(33%) developed at least one behavior problem.
"(17.9%) had an increase in biting habits or intensity."
"(15.4%) would not use the litter box."
Source: World Small Animal Veterinary Association - 2001

Many declawed cats become so traumatized by this painful mutilation that they end up spending their maladjusted lives perched on top of doors and refrigerators, out of reach of real and imaginary predators against whom they no longer have any adequate defense.

A cat relies on its claws as its primary means of defense. Removing the claws makes a cat feel defenseless. The constant state of stress caused by a feeling of defenselessness may make some declawed cats more prone to disease. Stress leads to a myriad of physical and psychological disorders including supression of the immune system, cystitis and irritable bowel syndrome (IBS).


Moral, Ethical and Humane Considerations

The veterinary justification for declawing is that the owner may otherwise dispose of the cat, perhaps cruelly. It is ethically inappropriate, in the long term, for veterinarians to submit to this form of moral blackmail from their clients.

"The Association of Veterinarians for Animal Rights is opposed to cosmetic surgeries and to those performed to correct 'vices.' Declawing generally is unacceptable because the suffering and disfigurement it causes is not offset by any benefits to the cat. Declawing is done strictly to provide convenience for people. The Association of Veterinarians for Animal Rights (AVAR)"

"Some veterinarians have argued that some people would have their cats killed if declawing was not an option. We should not, however, allow ourselves to taken 'emotional hostage' like this. If a person really would kill her or his cat in this case, it is reasonable to question the suitability of that person as a feline guardian, especially when there are millions of non-declawed cats living in harmony with people."

The Association of Veterinarians for Animal Rights (AVAR) position on declawing cats:
"A major concern that the AVAR has about declawing is the attitude that is evident in this situation. The cat is treated as if he or she is an inanimate object who can be modified, even to the point of surgical mutilation, to suit a person's perception of what a cat should be. It would seem more ethical and humane to accept that claws and scratching are inherent feline attributes, and to adjust one's life accordingly if a cat is desired as a companion. If this is unacceptable, then perhaps a different companion would be in order."

Dr. Nicholas Dodman, Professor of Behavioral Pharmacology and Director of the Behavior Clinic at Tufts University School of Veterinary Medicine and internationally known specialist in domestic animal behavioral research, explains declawing:
"The inhumanity of the procedure is clearly demonstrated by the nature of cats' recovery from anesthesia following the surgery. Unlike routine recoveries, including recovery from neutering surgeries, which are fairly peaceful, declawing surgery results in cats bouncing off the walls of the recovery cage because of excruciating pain. Cats that are more stoic huddle in the corner of the recovery cage, immobilized in a state of helplessness, presumably by overwhelming pain. Declawing fits the dictionary definition of mutilation to a tee. Words such as deform, disfigure, disjoint, and dismember all apply to this surgery. Partial digital amputation is so horrible that it has been employed for torture of prisoners of war, and in veterinary medicine, the clinical procedure serves as model of severe pain for testing the efficacy of analgesic drugs. Even though analgesic drugs can be used postoperatively, they rarely are, and their effects are incomplete and transient anyway, so sooner or later the pain will emerge." (Excerpted from The Cat Who Cried For Help, Dodman N, Bantam Books, New York).

Declawing robs a cat of an integral means of movement and defense. Because they cannot defend themselves adequately against attacks by other animals, declawed cats who are allowed outdoors may be at increased risk of injury or death. Scratching is a natural instinct for cats and declawing causes a significant degree of privation with respect to satisfying the instinctive impulses to climb, chase, exercise, and to mark territory by scratching. Cats simply enjoy scratching. The sensible and humane solution to undesirable scratching is to modify the cat's conduct by making changes in the environment and direct the cat’s natural scratching behavior to an appropriate area (e.g., scratching post) rather than surgically altering the cat, thereby causing the animal pain, merely to fit the owner's lifestyle, aesthetics, or convenience.

The fact that many cats recover from the hideous experience of declawing without untoward effects, and even though they may not hold grudges, that doesn't seem sufficient justification for putting a family member through such a repugnant experience. In short, a declawed cat is a maimed, mutilated cat, and no excuse can justify the operation. Your cat should trust you, and depend upon you for protection. Don't betray that trust by declawing your cat.

Most people are vehemently opposed to declawing due to a combination of reasons: 1) because the end (owner convenience) doesn't justify the means (causing unnecessary pain to the cat); 2) because other, less harmful alternatives to declawing exist and 3) because claws are part of the nature or "catness" of cats. Overall, the view is that it is ethically inappropriate to remove parts of an animal's anatomy, thereby causing the animal pain, merely to fit the owner's lifestyle, aesthetics, or convenience without any benefit to the cat. It should be emphasized that "most people" includes virtually the entire adult population of Europe and many other countries around the world.

Many countries are particularly concerned about animal welfare and have banned declawing as abusive and causing unnecessary pain and suffering with no benefit to the cat.. One highly regarded veterinary textbook by Turner and Bateson on the biology of cat behavior concludes a short section on scratching behavior with the following statement: "The operative removal of the claws, as is sometimes practiced to protect furniture and curtains, is an act of abuse and should be forbidden by law in all, not just a few countries."


Declawing Cats is actually illegal in:
France, Germany, Austria, Switzerland, Norway, Sweden, Denmark, Finland, Netherlands, Australia, New Zealand, Brazil, England, Wales, Scotland, Northern Ireland and Los Angeles.


Alternatives

There is a simple alternative available for you and your cat. Introduce a scratching post. You can make one yourself or it can be purchased. Your cat's scratching post should be tall enough so your cat can stretch completely when scratching, and stable enough so it won't wobble when being used. It should be covered with a strong, heavy, rough fiber like the back side of carpeting and lined with catnip.

Scratchpost photo Scratchpost.jpg

Make the post a fun place to be by placing toys on or around it, or by rubbing it with catnip, and put it in an accessible area. If you're trying to discourage your cat from scratching a particular piece of furniture, try placing the post in front of it, gradually moving the post aside as your cat begins to use it regularly.

A quick squirt from a water bottle will let your cat know when it has made a wrong choice between your furniture and the scratching post. Training your cat to use its post helps increase the bond between the cat and owner by increasing communication.

Clipping the nail tips every week or two keeps nails short and less able to do damage. With the owner's patience and training, most cats will allow nail trimming.

If possible, get your kitten used to having its feet handled and nails clipped while young. Let your veterinarian show you how to trim your cat's nails. The only equipment necessary is a good pair of nail clippers. Don't forget to praise your cat while you clip the nails, and reward him with a treat.

Source: Max's House